Build a (Poor Man's) Arcade Machine - On a Budget of 200$ or Less!

I was watching a bunch of YouTubers who were creating arcade machines from scratch. What they did was really impressive but I didn’t have the handyman skills or equipment (or money) to match them. I still wanted to make a game machine however and ignore how scrappy it is. Whatever it ends up, I’ll be proud of my work. It’s all about improvisation anyways, right?

My goal was to build an arcade machine (that didn’t look like one) with things that I already have avoiding buying new parts. A rummage in the basement storage locker presented me with quite some surprises. I’m encouraging you to use as much as what you already have.

Just because you’re on a tight budget, doesn’t mean you can’t have fun. We’re stretching it thin and keeping the total cost under 200$. That’s much less than experts who spend thousands of dollar on tools, wood, expensive TVs, arcade controls and so on. I, in some way, envy them because looking at these builds make me feel skilless (and poor).

Keep in mind that this budget is for the minimum required to build a working machine. You may opt for higher end parts or have many of them already lying around. I personally didn’t have to make any new purchases since I had the components needed.

Let’s take a look about how you may find yourself into the way of fun without overdrawing your account.

The Parts You Need

The Computer

Obviously, you’ll need something to actually run your arcade machine and run the emulators and ROMs so you can play them. A local store, The Trailing Edge, sells refurbished PCs that office businesses discarded them. They had a pretty old machine that was priced for just under 100$. The reason I had it was for testing my software on a slower and older machines to see how it performed. I no longer needed it when virtual machines had support for reducing the execution cap thus emulating a slower machine. It sat in my closet doing nothing and collecting dust.

Some much cheaper alternatives are Raspberry Pi Boards. They provide a very compact system that is very inconspicuous and silent. These systems have become powerful enough to run retro games with no fuss. There are other single-board computers for about the same prices but I prefer the RPI because it’s the most popular one and has the best software support.

Don’t forget to check eBay for refurbished laptop and desktop computers for a very cheap price. You don’t need anything more powerful than a Celeron processor and 4GB of RAM. You could probably get away even less.

Check you’re existing inventory of computer devices. Over the years I’ve purchased many Raspberry PIs and single-board computers hidden in messes of drawers. Some old laptops were hanging around too but I’ve sold most of them.

Cost: 35$ - Raspberry Pi 4 Model B (1GB RAM)

The Software

Emulator front-ends have developed beautiful interfaces and easy setup. There’s so many choices and I’ll only list a few. Keep in mind setup can be a bit clunky and keep the official documentation handy and don’t be afraid to ask online for some advice.

If you’re using a PC, my favourite frontend is without a doubt LaunchBox/BigBox. It does cost some money but I already had purchased a license for my HTPC. There are some free alternatives with beautiful UIs such as Lutris and Playnite. There’s also EmulationStation which is very popular with Raspberry Pi users.

The games themselves are not that hard to find on the Internet but there’s huge moral concerns over obtaining them. While owning the game is usually enough, some take it far and dump the ROMs from the cartridges. Both solutions are expensive and it seems unreasonable that you’ll be chased around for software that’s more than 30 years old (unless you’re Nintendo).

One advantage of using a PC is that you can include other games such as your collection from Steam or whatever else you may have. Of course, the limited performance of these puny single-board machines that you got your hands on might not be able to play more demanding and serious games.

In the Gems section on this website, in the Piracy section at the bottom, you’ll find ways to obtain these ROMs. I’m also making a shameless plug for my curated ROM collection TopRoms which will shrink the footprint of having every game in existence rather than just the popular and high quality ones.

Of course, the frontends can’t actually run the game. While some projects like RetroPie and Recalbox will already have emulators configured other software will require you to download an emulator yourself. RetroArch is currently the most popular multi-emulator software with great compatibility and performance. One thing you’ll need to keep in mind, there’s a lot of manual setup to get things working properly so you’ll need to be stuck with documentation and using online queries.

The emulators and frontends currently available have never made it easy to get things up and running. The technical nature of these software caters more to those who have a good understanding of computing in general.

Of course, you can use the operating system of choice whether it’s Windows or Linux. Take a peek at AlternativeTo find the software that works for you.

Cost: 0$ - RetroPie

The screen

Many business are putting away their screens for something bigger and maybe better quality. Although virtually every monitor on sale these days are 16:9, this can be a little jarring since most classic games run at 4:3 aspect ratio. So the extra wide screen space won’t be useful.

There are many places where you can find cheap monitors for very low prices. Checkout liquidation centres, thrift stores and eBay. You may find something that costs less than 40$.

Personally, the monitor I had was a hand me down. It’s 10 years old now but It still works well. One frustration is that I lost the base for the screen and had to secure it by improvising with book ends and sticky tac.

Some purists may prefer CRT screens since they provide better response times and keep that authentic look because these older games were designed to run on them. You’ll usually find on them on classified ranging from free to unusually expensive prices.

One last thing to keep in mind, it’s likely that you’ll be standing while playing on the machine. As a result, the screen needs to be tilted very far back, almost at a 45 degree angle. It’s possible your screen stand that doesn’t move that far so be ready to improvise.

Cost: 35$ - Refurbished 17” Monitors

The Controllers:

I have to admit that controllers can make or break the gaming experience. So perhaps this is a place you can spend a bit more money. You can find cheap ones all over. In my opinion, the best bang for your buck is the Logitech F310. The buttons are firm, the D-pad reasonable and some nice shoulder buttons. Taking a quick at local stores, you can obtain one for 25$. If want something wireless, you might be paying double. But, if you want that authentic arcade experience, you’ll have to shell over 200$ for arcade style controls or buy a DIY kit which is only a bit less. I personally had some 8BitDo classic controllers lying around unused so they got connected to the PC.

Cost: 2x25$ - Logitech F310 Gamepad

Keyboard and Mouse

It’s almost certain that you have some old keyboards and mice lying around in a closet or storage room. You really don’t need anything fancy for the seldom cases where you need to configure the machine.

Look at local stores, thrift shops and liquidation centres. You can probably find a combo for less than 5$. The feel and accuracy of the mice and keyboard might leave quite a bit left to desire but it will enough for the rare times you will use it.

Another alternative is the air-mouse/keyboard combo that many HTPC enthusiasts use. I had two lying around from old HTPC projects. Finding one for less than 30$ is not impossible though.

Cost: 15$ - iCAN Keyboard and Mouse Combo

The Speakers

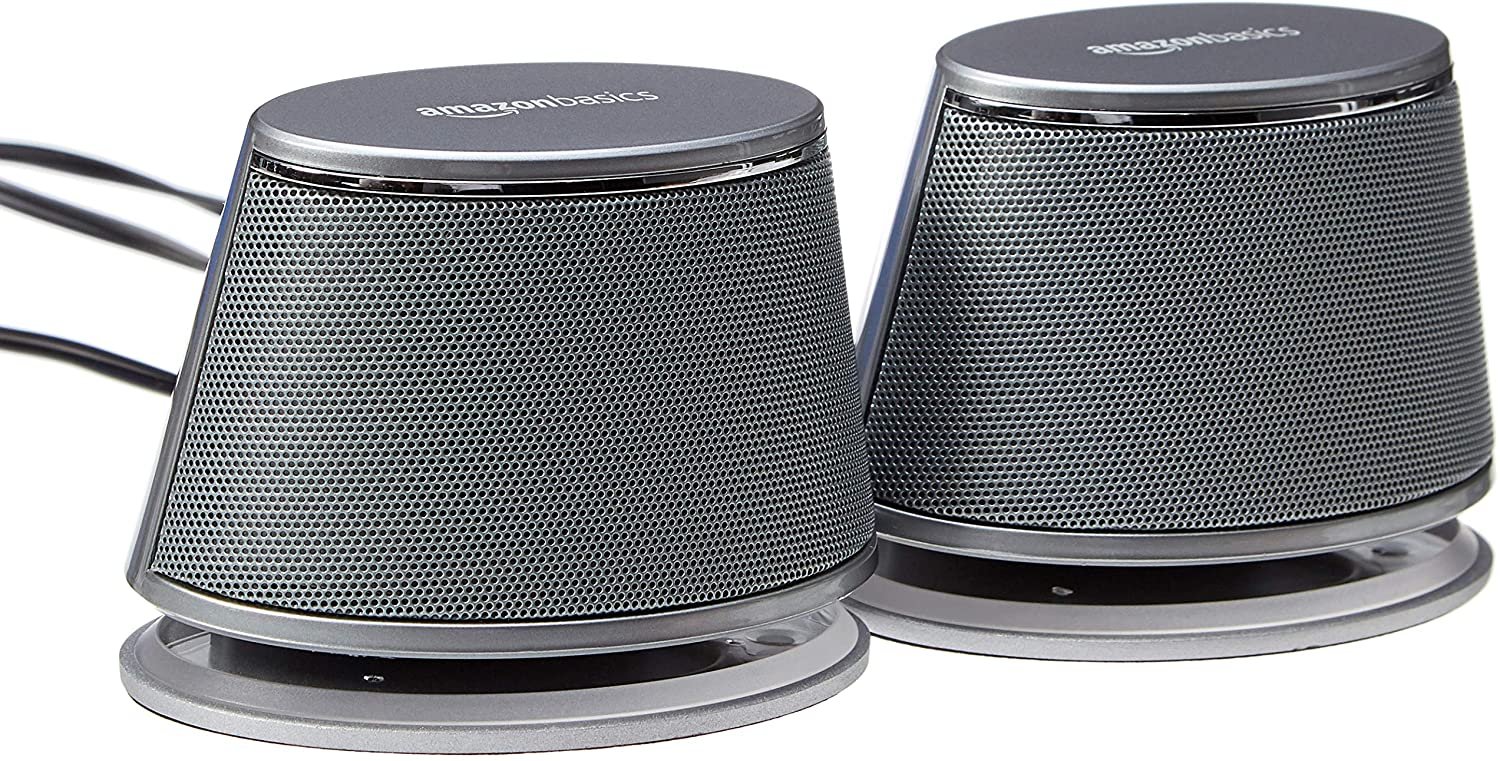
An acceptable set of PC speakers can be found for as low as 25$. You can also use Bluetooth speakers if you have one that you’re not using. Your screen may even have built-in speakers. The sound quality doesn’t have to be amazing, just enough to transmit the bleeps-and-bloops from our beloved classic games.

Cost: 22$ - AmazonBasics USB-powered Speakers

The Stand

This is the part where you probably have the most freedom. A quick look through Amazon and Ikea reveals many candidates for keeping your machine off the ground. Try finding high dining tables with casters, a small desk, a tall chair and so on. You’ll find furniture everywhere from thrift stores, to IKEA and many other places selling cheap furniture.

I personally used a sofa table with casters to keep things up. I was planning to use it for eating on the couch but it was too high. So it found new use after some minor changes.

Cost: 33$ - Furinno Just 3-Tier Turn-N-Tube End Table

The Odds and Ends

Remember you’ll need cables and power strips to get everything tied together. Some cable management ties might help keep your system clean. I tend to collect cables and I was able to find everything I needed. Otherwise head out to various online stores like Amazon and Monoprice and so on. Also take a peek at dollar stores.

Conclusion

There we have it folks, the total comes to almost exactly 200$ (192$). Taxes and shipping were not included since they vary based on your location. If you’re reading this blog post, you’re probably a technology nut like me having wasted much money on things that became useless and obsolete quickly. Anything that you’re not using is an opportunity to save money and reuse something that was destined for the electronics recycler.

This is what my system looks like after completion. It looks like a hack job but it does exactly what I need it to do, play games!

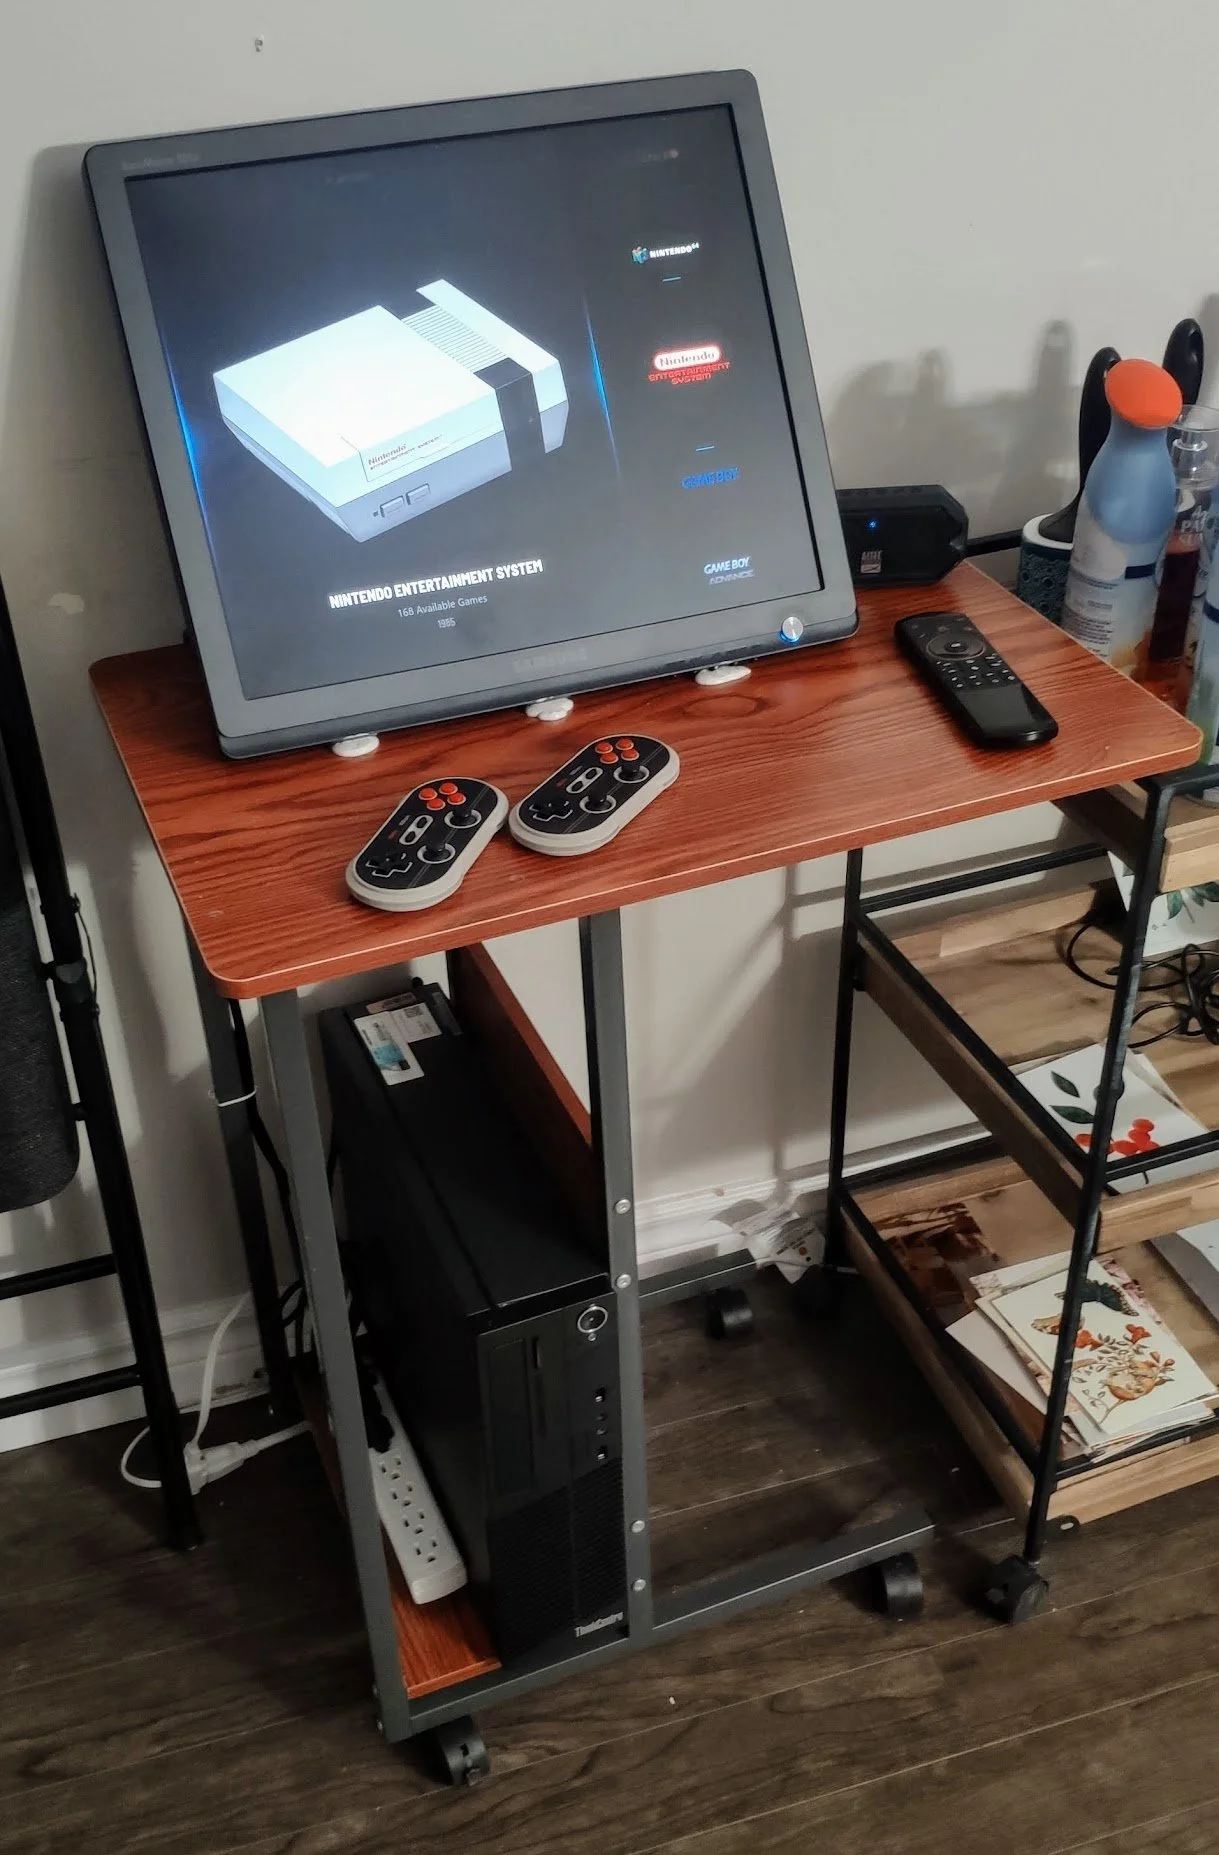
However, don’t forget to add your magic touch to your build and keep the pride of what you have managed to do on a shoestring budget. 

Feel free to share in the comments below what kind of setup you have managed to build. It would be awesome to share pictures of your masterpieces whether it was a glued together rush job or a fully fledged arcade cabinet. There’s no floor or limit here.

Announcing Live at the Intro - A Video Game Music Online Radio

There’s an intangible experience that only video game music can provide. Known for their strong and incredibly consistent melodies, it’s easy to understand why many listen to this kind of music regularly. Unlike other types of music, video game music isn’t designed to take away your attention from the game but rather provide an ambience to the level and push you to move forward. This is why many study video playlists are composed of video game music.

While everyone has love for classic video game soundtracks from Mario, Zelda, Sonic and so on, it gets repetitive to listen to them all the time. Unlike my competitors, I dig deep to find the gems that are rarely heard but also balancing it with a touch of our favourite classics. There are many underappreciated artists who push chips to the limits.

Enjoy the masterpieces from Jesper Kyd, Matt Furniss, Chris Hülsbeck, Yuzo Koshiro, Tim Follin, Barry Leitch and many others. The station runs 24/7 providing a random selection of different eras from the Amiga to the Modern and everything in between. There’s never a dull moment on our station and hope that you enjoy VGMs as much as we do.

There are many ways to listen to the station but the simplest way is accessing the radio page. More methods to listen and additional information can be found on the Live at the Intro page. Our collection of music is ever expanding for the variety that we all crave. Enjoy!

♫ Radio Page

Song of the Day 002 - Night Sweeper (Hyper Duel - Arcade) - Hyakutaro Tsukumo

A disclaimer: chiptunes require a certain appreciation for them to enjoy them and compare them against each other. Few people have the acquired taste for this type of music.

There’s one constant that I know Technosoft for is the magician composers they hire for making their soundtracks. Some of my favourite music is from them with my head full of the melodies from Thunder Force IV. Being Technosoft, it’s not hard to guess what kind of game Hyper Duel is, a shoot-em-up, a difficult and unforgiving one. I have the impression that it follows more in the footsteps of the Thunder Force games from the Sega Saturn rather then the earlier Sega Genesis versions.

The game was released in 1993 and then ported to the Saturn with improved graphics and reworked music in 1996, in Japan only. The game is a very typical shoot-em-up that scrolls horizontally with your selection of enemies, mini-bosses and difficult end bosses. It is extremely challenging where a single hit costs you a life, no life bar here.

The chip being used is the Yamaha YMF292 which combines FM Synthesis with clear sounding PCM samples. The channels could be combined in various ways to generate certain effects though honestly this is a bit over my head. It was also known as the Saturn Custom Sound Processor, and the Saturn being known for its complexity, it’s a tricky chip to get good music out of. The chip was used in some arcade boards and the Saturn. The Arcade version used the Yamaha chip while the Saturn version of the used CD Audio for the remastered music.

The rendition that I’m publishing here is the Arcade version which plays in stage 7. It’s a simple song with excellent percussion sounds and has a chorus which will become obvious because it repeats itself so many times. The song is short, extended by repetition. This would be considered a 32-bit chiptune where it combines FM Synthesis to support the main melody with PCM Samples for drums and kicks.

NES Musical Masterpieces

This article requires some knowledge of oscillation for producing sound. I’ll also confess that determining what chiptune sounds good requires an appreciation for them.

In my opinion, the Nintendo Entertainment System is the first video game console to feature games that have gameplay that still holds up to today. People still play NES for their playbility rather than solely their nostalgia factor. Older consoles like the Atari 2600 featured very simplistic games that gamers only play today for nostalgic reasons. Those who didn’t grow up with the Atari console don’t find any meaning in them.

I’m not sure if I mentioned this before on my blog, but I have an incredibly soft spot for chiptunes. There’s a charm to pushing these chips that can only make simple sounds to their limits to create a beautiful piece of music. I enjoy melodic music and what other than video games have solid and consistent melodies? There are some composers that I consider magicians because they make songs so deep that you’d put it in a club.

The NES APU, the sound chip in the NES, is what generates the simple tones to create music and sound through the console. Quality was lukewarm with the original Famicom and NES that outputed sound and video through a single coaxial cable. Eventually, a composite output was added providing a purer sound, though it was mono only despite many artists writing stereophonic music. Certain enthusiasts build mods to extract both channels.

There was five channels on the APU. Two pulse-wave (square) channels with four pulse-width settings in addition to a triangle channel. A random noise generator. Finally, a PCM for playing samples, although low-quality due to memory limitations.

I’ll give a basic explanation of how most games used these channels though some artists were more creative with their use. The two pulse channels supported the main melody, one was the main one and the other supported it (say with a slightly different pitch). The triangle channel was used to add bass. Finally, the noise channel was used for percussion.

Additional sound chips were used in cartridges that added extra channels or FM synthesis. I will talk about a few of these later but won’t cover all of them since there’s quite a few. I’ll go through some games that use them. Unfortunately, the sound chips could only be used on the Japanese Famicom since the NES didn’t have the sound passthrough through the cartridge slot. American ports of these games had to make shift with use of the available 5 channels and often the game sounded more muddled in comparison to their Japanese counterparts.

I want to take a dive into a few a games that have music that I consider ‘masterpieces’. There’s no real criteria other than my subjective tastes. Many won’t agree with me but I’m sure it will be appreciated by those who love ‘old things’. I hope you enjoy a few tunes and the order is set by my preference.

Super Mario Bros.

The overworld theme in Super Mario Brothers isn’t something I would consider a masterpiece. However, it’s such a classic that I felt that I had to include it here. There’s not much to comment about, it uses channels in the same way that most games do. Virtually everyone has heard some version of this song and I would consider it the prime example of chiptune.

Super Mario Bros. (World) (HVC-SM)_001.png
Super Mario Bros. (World) (HVC-SM)_003.png

Some noticed that parts of the music would be interrupted while jumping. It’s because all five channels were used for the music and nothing was left for sound. The sound effect would take place of one of the square wave channels so that it could play.

Mega Man 2

I would best describe Mega Man 2’s music as the ‘traditional’ sound of the NES. No special techniques are used for production, no intense melodies; just music that perfectly fits the atmosphere and theme of the level or the situation.

Mega Man 2 (USA)_001.png
Mega Man 2 (USA)_004.png

The boss of the stage, Quick Man, uses electricity as his weapon therefore the music has an electric sound to it. The music also plays at a faster tempo because of Quick Man was quicker than other bosses in the battle.

Mega Man 2 is an excellent example that simple music can still sound pleasant without the input of a master who knows every limitation of the chip and instead used it traditionally. Mega Man 2 uses the typical channel setup that was mentioned above for producing melody and beat.

One interesting fact about the composer’s goal was to create very simple melodies only composed of a few notes. The idea was to make catchy songs that were almost as simple as a pop song with a similar structure.

Silver Surfer

Tim Follin is probably the composer with the worst luck. He pushed soundchips to their limits making some amazing pieces except there was one caveat, the games he was contracted for were absolutely terrible.

Silver Surfer was torn apart more than a decade ago by The Angry Video Game Nerd. It sent him into a fit of endless cursing and swearing. However, he oddly didn’t comment on the amazing music in the game. Maybe he was too distracted by the awful gameplay.

The insanely fast paced music almost sounded something that would come out of the SID Chip on the Commodore 64. It was demoscene quality to be honest. He even managed to produce a convincing electric guitar sound.

Silver Surfer (USA)_001.png
Silver Surfer (USA)_002.png

The kick sound isn’t created with the usual DPCM sample like done in most games. Instead the triangle channel is with a pitch change is used to create a quick thump. He uses the same channel for the kick but what really showed that Tim Follin was a master at his art is that the two never played at the same time. It required quite a bit of creative production to never have them clash.

I really want to highlight how bad his luck is. Imagine being the composer for a Pictionary game, I’m sure you’d write something atmospheric and melow. Instead, Follin decided to compose something that would fit an Action-Adventure game where you’d be saving the galaxy from mutant aliens.

This is unusually intense for a board game but perhaps this was to make up for the boring nature of the game. I wonder what kind of music we’d end up with if he was composing for Chess Master.

Admittedly, Tim Follin confesses that he often didn’t compose music to follow the theme of the game but rather see what he could do with the limitations of the sound chip. That might explain the situation with Pictionary.

Pictionary - The Game of Video Quick Draw (USA)_001.png
Pictionary - The Game of Video Quick Draw (USA)_002.png

Journey to Silius

If any game completely broke the rules on the traditional method of using channels, it’s Journey to Silius. The artists did an amazing job of creating something that sounded so much fuller than the average NES game. The bass was stronger, the melodies more engaging and a beat that sounded completely different.

The two pulse channels were still used for the melody but instead of using the noise channel for the drums only, they combined the noise and triangle channels to create a very realistic sounding drum. This was because attack was done with the noise channel and decay using the triangle channel. However, the stroke of genius was using the traditionally unused DPCM sample channel for the bass. The samples used for the bass are pretty high quality and provide for that deep sound we crave when listening to music.

Journey to Silius (USA)_005.png

Castlevania 3

The music between the American and Japanese Castlevania sound completely different. This is due to the use of a chip VRC6 which adds two square wave channels (pulse) and one sawtooth channel. It’s not secret that having additional channels creates for a deeper sound and this is definitely the case for Akumajou Densetsu. There’s not much to comment other than to listen.

Akumajou Densetsu (Japan) (Virtual Console)_002.png

It’s quite obvious that the American version sounds much more dull. The artists didn’t really use any creative techniques to make up for the missing VRC6 chip. Instead, they used the typical arrangement using channels to generate beat and melody. It’s a bit disappointing.

Lagrange Point

Lagrange Point doesn’t sound like any NES game in existence. Rather than primitive sounds, we hear a pleasant and smooth track being played. This is due to the use of a special chip, the VRC7, which adds 6 channels of FM Synthesis. The sound produced ends up reaching 16-bit territory.

I won’t go into detail of what FM Synthesis is because I’m leaving that for another blog post. However, it can be noted that the VRC7 is used exclusively for the music while all other sounds effects are still done with the NES APU. The contrast between the two sounds is a bit jarring in my opinion and generates a disjumbled mess of 8-bit and 16-bit sound. I have to admit it’s quite strange to see 8-bit graphics with 16-bit sound, it doesn’t feel right.

Lagrange Point (Japan)_001.png

Gimmick!

Gimmick! (Japan)_002.png

This company is playing its magic tricks again. If anyone could make the 8-bit NES sound and look 16-bit, it would be Sunsoft. Wikipedia lists some of the amazing techniques to generate such beautiful graphics using mostly graphics tiling optimizations.

My favourite track is an unused one, Strange Memories of Death. It has all the elements of a good song, catchiness, good production, a rich sound and oddly a dark undertone which flows really smoothly.

Gimmick was the only game to use the Sunsoft FME-7 chip which contained the Sunsoft 5B. It contained extra channels which the game used mostly to produce more bass (similar to Journey to Silius). Interestingly, the game didn’t make use of all the channels of the chip neither were all the features such as noise. It’s also the only game that uses the chip.

I put Gimmick! last on this list because it’s my favourite soundtrack on the NES. It spans multiple genres and sounds like a mix of different video game music styles. Apparently, this is what the artist intended. It has a rich deep sound unparalleled by any other NES game and I bet the bass would sound nice on a decent set of speakers or headphones.

Conclusion

This was just a small sampler of some of the good music that is on the NES. I haven’t played that many NES games and had to find other ways to discover interesting music. There’s a lot to listen to on grad1u52’s YouTube channel though unfortunately they add a reverb effect to the music which puts it further away from the original.

Chiptunes are an acquired taste for most people who are used to pop but I consider those to be simple music as well. I have shared with peers these songs and they have found them interesting but it didn’t light them up. It was just something that sounded different to them.

My next writing adventure will be about FM Synthesis which is my favourite way of generating sound. Most focus will be on the Yamaha YM2612 in the Sega Genesis and perhaps the OPL2 from the AdLib PC sound card.

If you have your favourites on the console, feel free to share them. Other kinds of chiptunes are welcome in the comments section below.

How to Drift a Bus

This is another satire...

I traveled to Japan last year and got a chance to meet the Drift King himself. I was doing a track day and drifting culture is hot in Tokyo. I got a chance to speak to Mr. Tsuchiya and he told me a funny story about drifting something you wouldn't expect:

Hi, my name is Keiichi Tsuchiya, and I am the Drift King. I call this maneuver the "Omenibussu Duriftu" and it cost me my job and sent me into abject poverty.

I started doing this on rainy days tired from my 8 hour shift of hauling passengers around, I needed to relax and have a bit of fun. I would move the bus side to side and then turn hard and the bus would drift. Passengers screamed and complained as I counter-steered the slide. The complaints lead to me being fired ending my career as a bus driver.

If you want to try this yourself and risk your losing your wage, just do the following mods and follow these instructions.

Make sure you inflate the rear tires of the bus as much as you can and deflate the front ones. This will make the bus prone to oversteer. I convinced the maintenance workers to install nitrous on the bus telling them that the bosses ordered us to test out this new ethanol reduction system. I even convinced them to weld the rear differential as it would help getting out of sticky situations in snow.

I recommend you do this with 40 footer bus as an accordion bus may lead to fish-tailing. Use a track with plenty of run of area to prevent accidents or the rapid-transit road if you're brave enough. You'll need a rear-engined, rear-wheel drive bus for this technique (a bit like the Porsche 911).

First, accelerate to 60 kph, and then swing the bus left and right until you reach the corner. While you swing, keep accelerating until 100 kph. Then once it reaches the turn, accelerate hard and let the bus slide without adding steering input. Half-way through the slide, counter steer and reduce throttle. It will work every time, at least for someone skilled like me.

The simulation was possible thanks to BeamNG.drive